Slack as an inbound channel
To start using Slack as an inbound channel:
Step 1. Create and configure an application
Before creating a channel in JAICP, you should create a Slack application and specify scopes and parameters required for the bot to work. As a result, the application will gain access tokens necessary to work with the Slack API. You will need them when creating a channel.
Create an application
- Sign in to Slack and go to the Slack API website.
- Click Create New App → From scratch.
- Specify the application name.
- Specify the workspace you want to connect the bot to or create a new one. To create a workspace, click the Sign into a different workspace link and follow the steps required.
- Save the changes.
Configure an application
-
Check that you use old design for application settings page. Otherwise, click Revert to the old design in the sidebar.
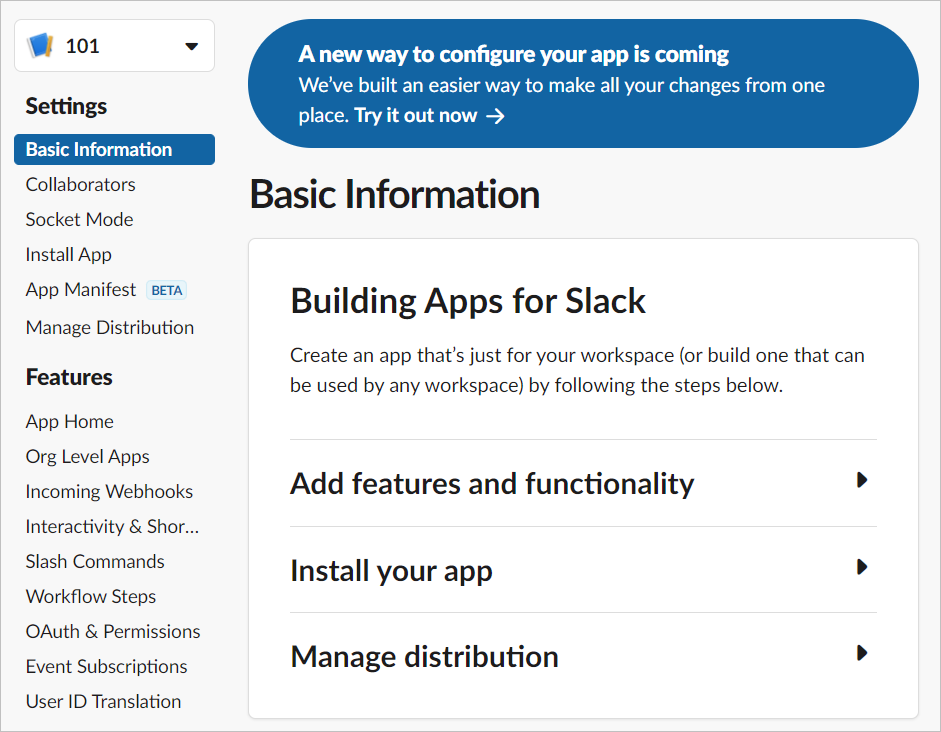
Example of the Basic Information page in the old design.
-
On the Basic Information page of your application, expand the Add features and functionality setting group and select Bots.
-
In the sidebar, select the OAuth & Permissions section and specify the following parameters in Scopes:
- For Bot Token Scopes:
chat:write,im:history,users.profile:read,files:read. - For User Token Scopes:
im:history,im:read,im:write,users.profile:read.
- For Bot Token Scopes:
-
In the sidebar, select the App Home section.
-
Click Edit in the Your App’s Presence in Slack setting group and specify:
- Display Name (Bot Name).
- Default username (it will be used when the bot is mentioned in messages).
-
In the same setting group, enable the Always Show My Bot as Online option. Now, your bot will always be online.
-
Go to the Show Tabs setting group and enable the Allow users to send Slash commands and messages from the messages tab option. This will allow users to send messages to the bot.
-
Select the OAuth & Permissions section on the left pane and click Install to Workspace to publish the application.
-
For the application, allow an access to a workspace.
-
Copy the tokens: User OAuth Token and Bot User OAuth Token.
-
In the sidebar, select the Basic Information section and copy the verification token in the App Credentials setting block.
Step 2. Create a channel
-
In JAICP, open your bot project.
-
In the dashboard, click Channels, then Connect channel in the Inbound section.
-
In the Messengers and social networks section, select Slack.
-
Specify the settings:
-
Name is the channel name.
-
Access token is the token copied from the Bot User OAuth Token field.
-
Verification token is the token copied from the Verification Token field on the Slack application page.
-
Application token is the token copied from the User OAuth Token field.
-
Branch is the project branch you want to deploy into the channel (
masterby default). You can also select a Git tag or enter a specific commit hash. -
Agent is a customer engagement platform (if you want to enable your bot to transfer dialogs to an agent when necessary). It should be configured and connected to your project.
-
Deployment is one of the two deployment options:
- Automatic: when you save the changes into the project.
- Manual: with the Deploy button in the channel description.
cautionYou have to deploy a script before starting the bot. At this stage, the system builds the bot, checks the script syntax, and performs tests.
-
-
Click Create.
-
Wait for the pop-up window with the result of the deployment.
Step 3. Connect a bot
- On the Channels page, click in the line with the Slack channel. Then, select Edit channel.
- Copy values from the Event request example and Interactive subscription request example fields.
- Go to your application page on the Slack API website.
- In the sidebar, select the Event Subscriptions section and turn on the Enable Events option.
- Paste the value copied from the Event request example field in Request URL.
- Expand the Subscribe to bot events setting group and add the
message.imevent to be handled by the bot. - Save the changes.
- In the sidebar, select the Interactivity & Shortcuts section and turn on the Interactivity option.
- Paste the value copied from the Interactive subscription request example field in Request URL and save the changes.
Step 4. Test the bot
Open Slack and go to the workspace you have connected the bot to. Select the bot in the Apps section and send a welcome/an activating phrase stated in your bot script. After that, your dialog with the bot starts.