Mailchimp integration
Mailchimp is a web service for creating messaging campaigns, managing mailing lists, adding new customers, and viewing reports.
If you frequently run messaging campaigns to your customers’ email addresses, then you better automate this process using a bot created in the Aimylogic visual editor.
Prepare Mailchimp
-
Create an account at Mailchimp.
-
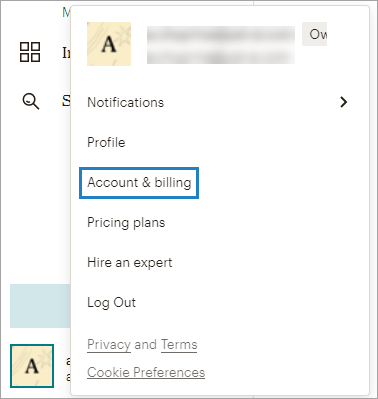
On the bottom-left corner, click the account name and select Account & billing.
-
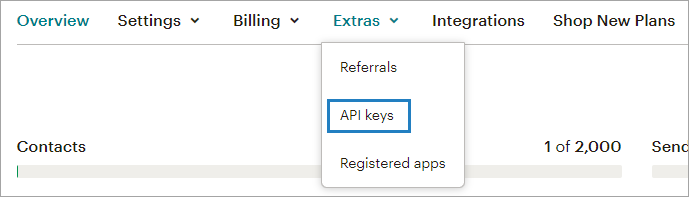
Go to Extras → API keys.
-
In the Your API keys section, click Create a key. You will get the API key that is used to make requests.
To run a messaging campaign using the Mailchimp API, you need to make three HTTP requests:
All requests will be made to the main URL: https://<ds>.api.mailchimp.com/3.0/ where <ds> is a unique ID for your account.
You can find it in the URL. We will use us3, https://us3.api.mailchimp.com/3.0/.
Prepare a messaging list
To create a messaging campaign, we need to make an address list to send our information to.
-
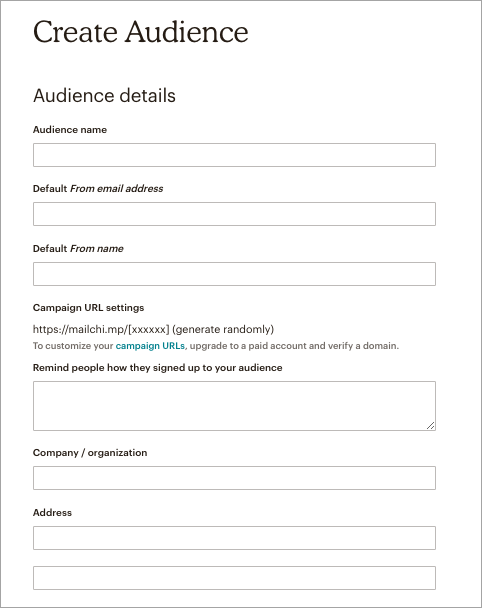
In Mailchimp, go to Audiences and click Create Audience. Fill out the required fields, for example:
-
Click Save.
-
Go to Audiences → Manage Audience → Add a subscriber:
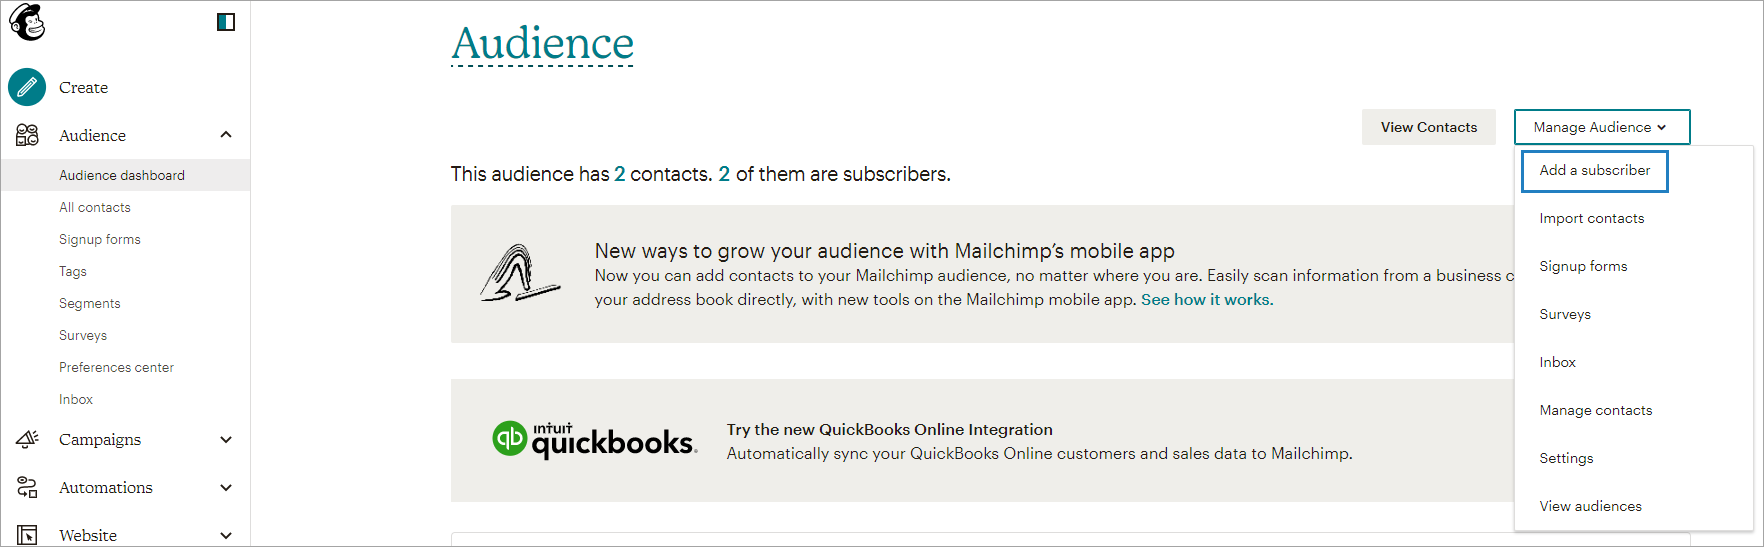
-
Specify user details to whom you plan to send information:
-
Check This person gave me permission to email them and click Subscribe.
The user is added; if you need to add more users, simply repeat the procedure. If necessary, you can upload an email list to Mailchimp.
Get audience ID
-
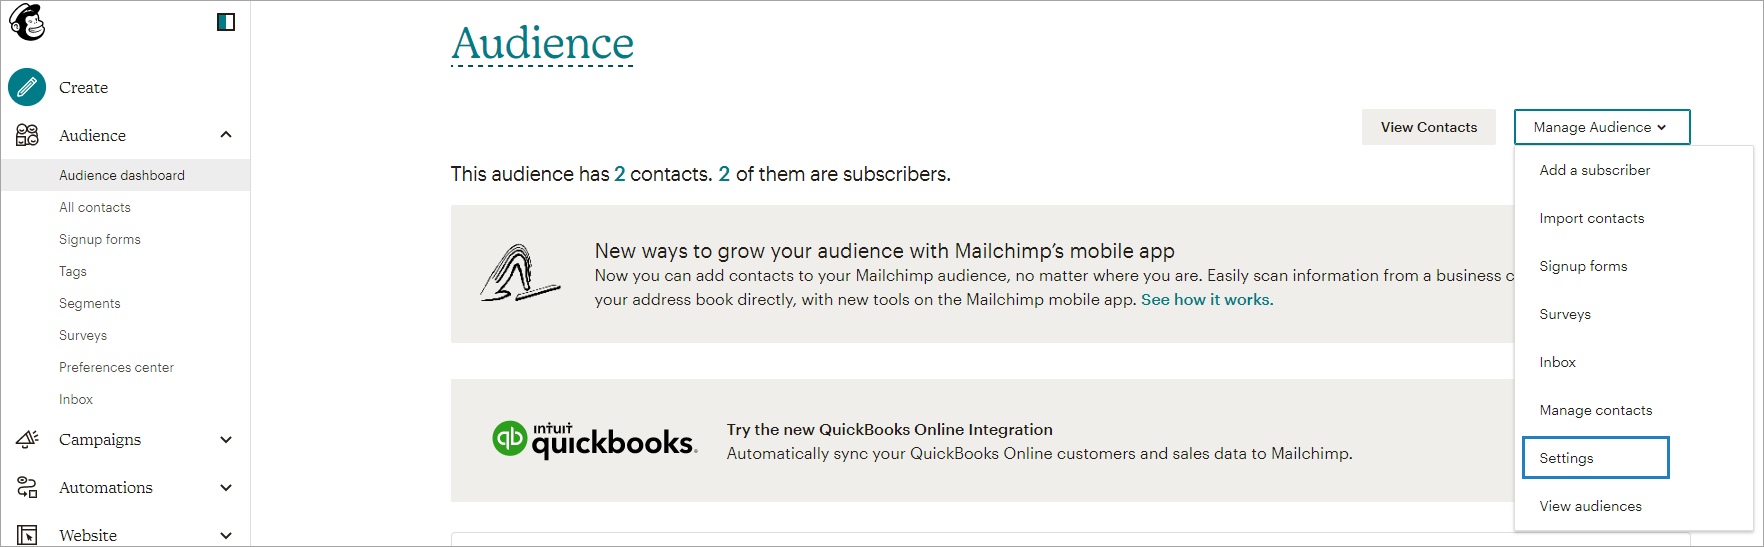
Go to Audiences → Manage Audience → Settings:
-
Scroll to the bottom of the page. There will be your audience ID.

And that’s all you need to do at the Mailchimp side. Now go to the script in Aimylogic.
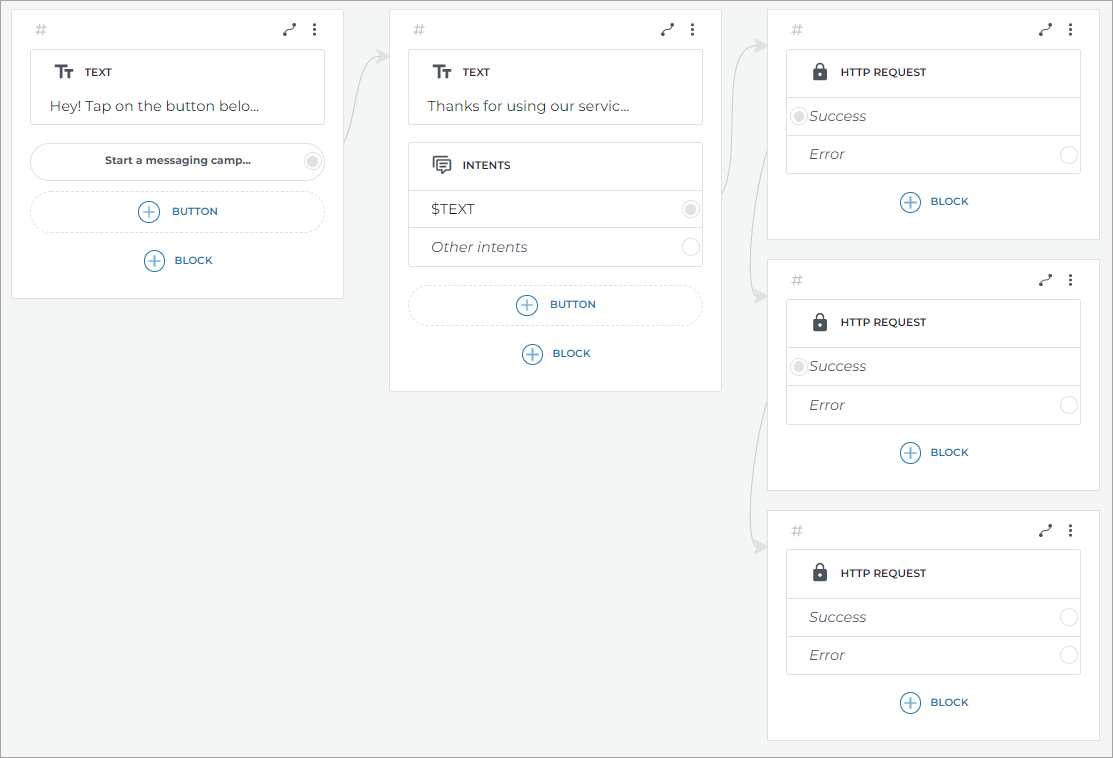
Set up Aimylogic script
-
Create the first screen and add a Text block with a hint and the Start Messaging Campaign button.
-
Create a screen with a Text block and an Intents block and place any text for your mailing campaign.
-
In the Intents block, use the
$TEXTsystem entity.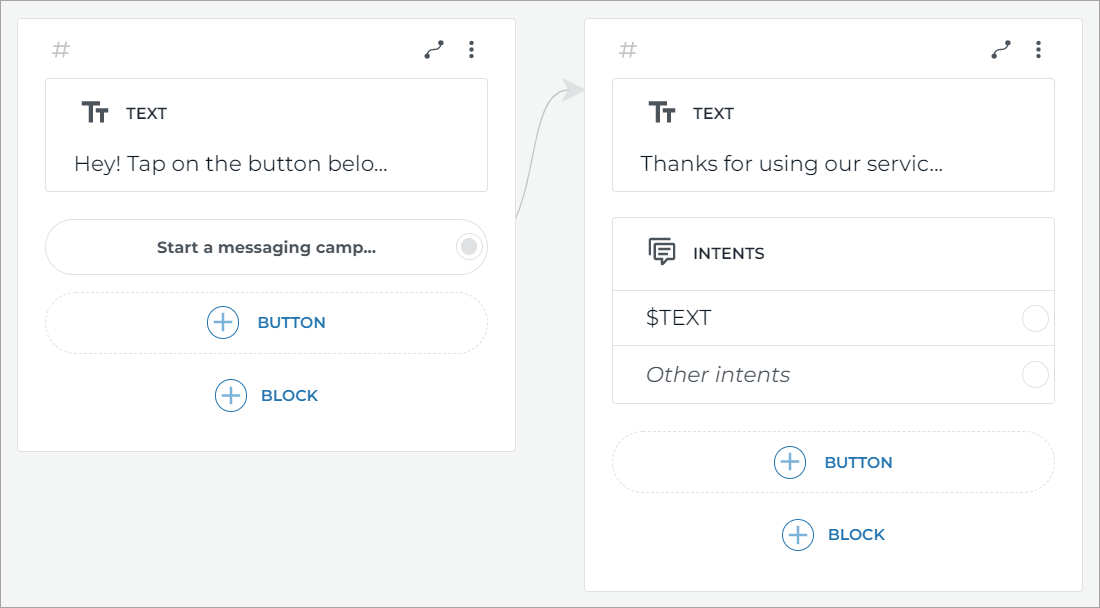
Add the first HTTP request
-
Add the HTTP request to a new screen. This HTTP request will create a mailing campaign. As described in the Mailchimp documentation, you need to make a
POSTrequest to a URL that looks like this:https://us3.api.mailchimp.com/3.0/campaign.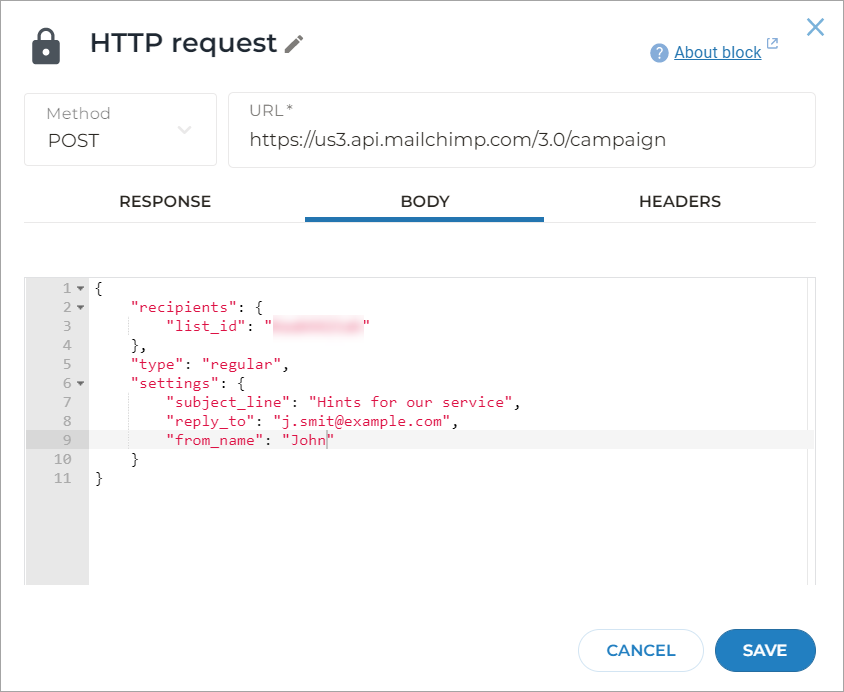
{
    "recipients": {
        "list_id": "Audience ID"
    },
    "type": "regular",
    "settings": {
        "subject_line": "Hints for our service",
        "reply_to": "j.smith@just-ai.com",
        "from_name": "John"
    }
} -
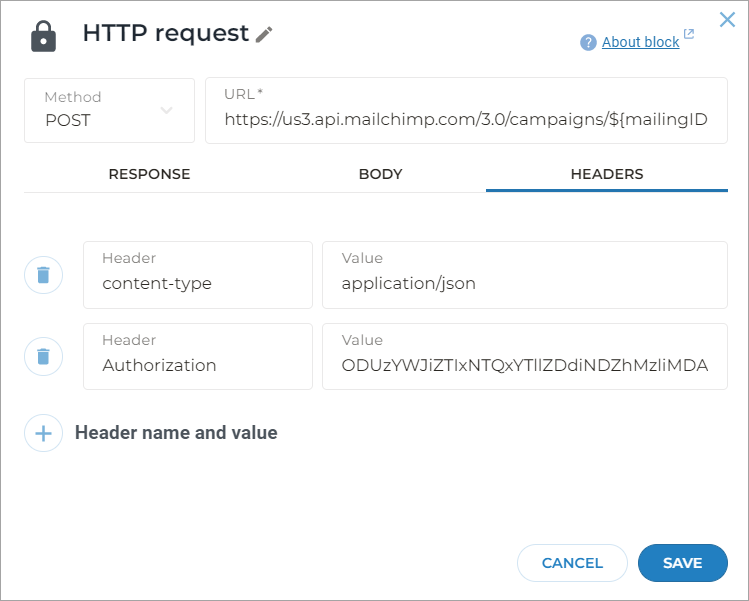
In this HTTP request, go to the Headers tab.
-
Add the
content-typeheader with theapplication/jsonvalue. -
Add the
Authorizationheader with your encoded API key as a value. Use Base64 to encode the key that you obtained in Mailchimp.For example, your API key
853abbe21541a9ed7b46a39b004b907qWerTywill look as following:ODUzYWJiZTIxNTQxYTllZDdiNDZhMzliMDA0YjkwN3FXZXJUeQ==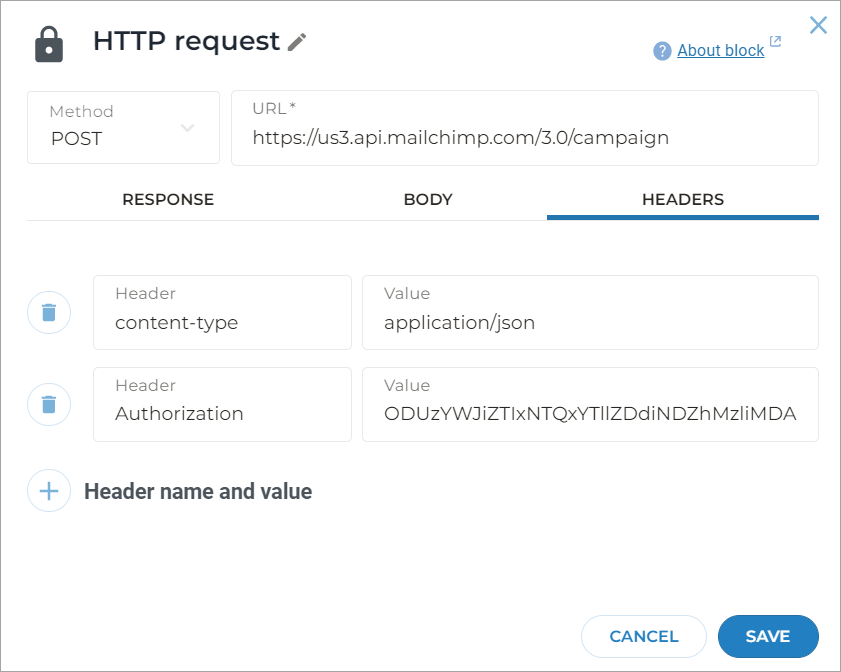
-
In the same HTTP request, go to the Response tab.
-
To get the ID of the created mailing list, assign
$httpResponse.idto the$mailingIDvariable.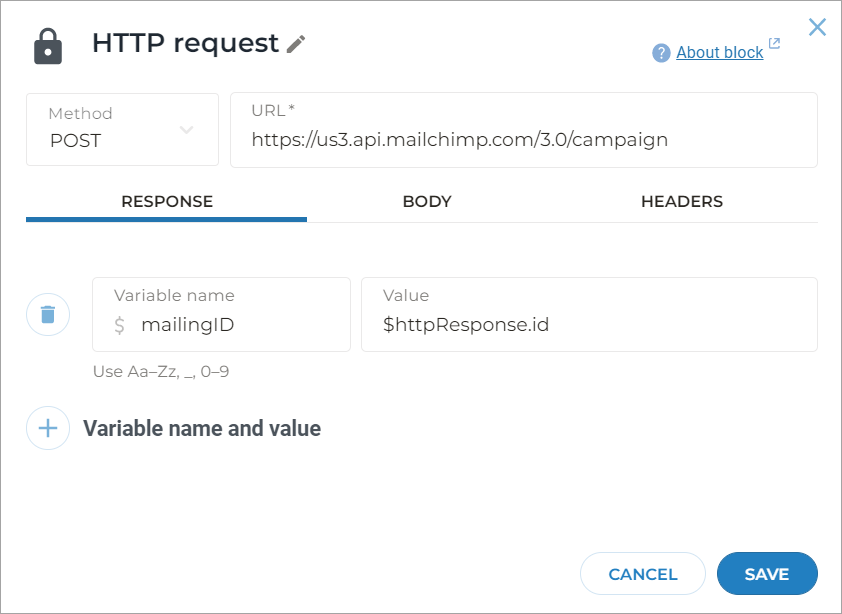
Add the second HTTP request
-
Create new screen with the HTTP request block and connect it with the first HTTP request block. This HTTP request will set the content for the mailing campaign you have just created.
-
As described in the Mailchimp documentation, you need to make a
PUTrequest to a URL that looks like this:https://us3.api.mailchimp.com/3.0/campaigns/${mailingID}/content. HeremailingIDis the variable from the first HTTP request. -
In the Body tab, write the following:
{
    "html": "<p>$TEXT</p>"
}$TEXTis the entity from the previous HTTP request.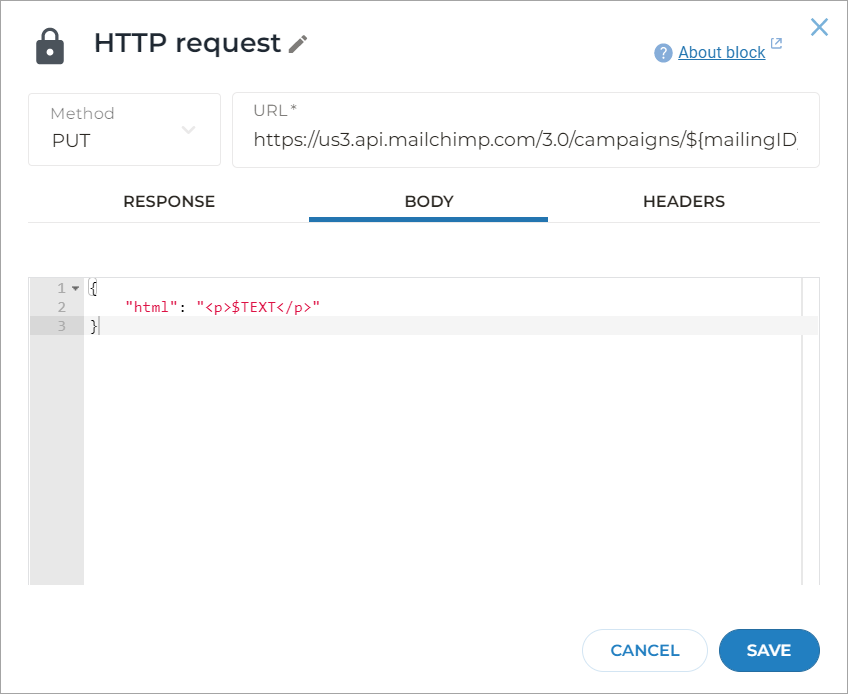
-
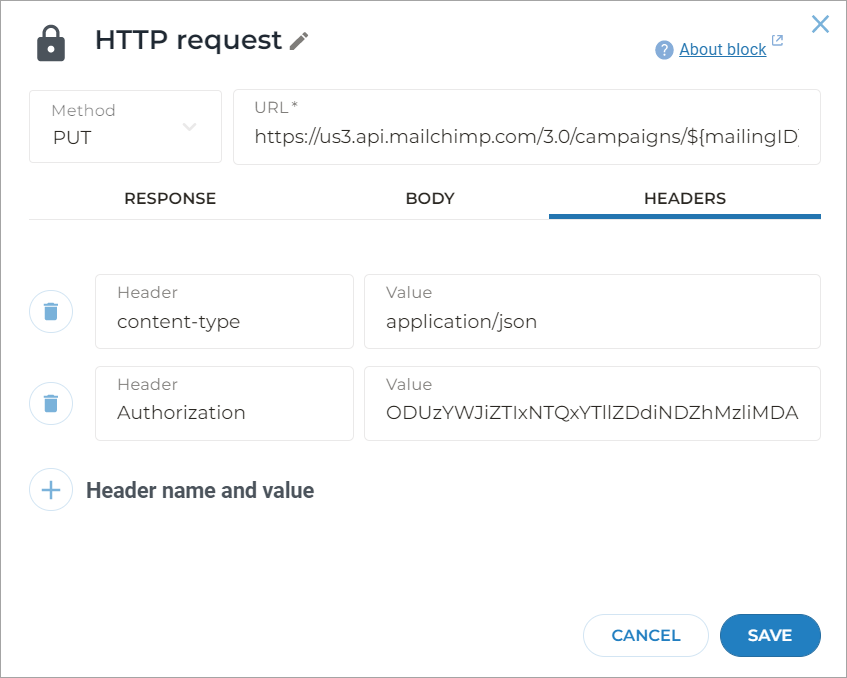
Add the same headers as in the previous request.
Add the third HTTP request
-
Create new screen with the HTTP request block and connect it with the second HTTP request block. This HTTP request will send your content to the desired mailing list.
-
As described in the Mailchimp documentation, you need to make a
POSTrequest to a URL that looks like this:https://us3.api.mailchimp.com/3.0/campaigns/${mailingID}/actions/send. HeremailingIDis the variable from the first HTTP request. -
Leave the Body field empty.
-
Add the same headers as in the previous request.
The resulting script looks like this: