Google Analytics integration
Google Analytics is a free website or application traffic analytics service provided by the Google search engine. It provides detailed data on all visitors, displaying information about the region, operating system, traffic source, and other important parameters.
From this article, you will learn how to track certain events in a chatbot created in the Aimylogic visual editor.
Prepare your Google Analytics account
-
Go to Google Analytics and sign up for an account if you don’t already have one.
-
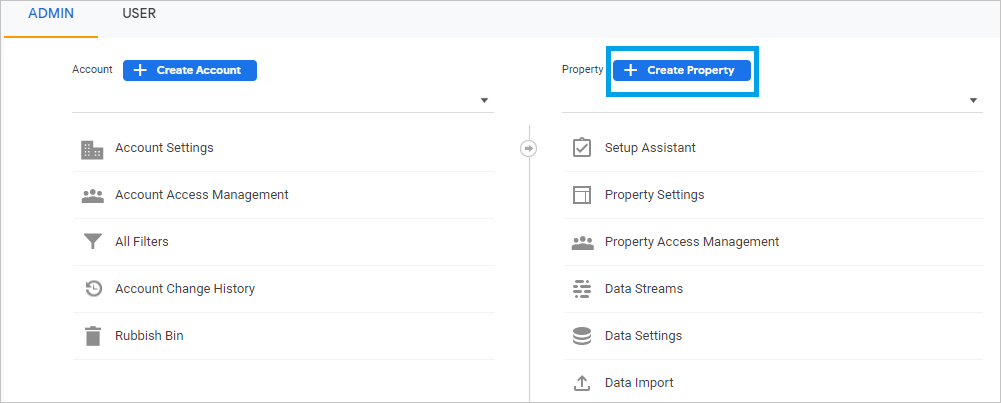
After registration, you can create your own project. To do this, select the Admin section on the bottom-left and click Create Property.
-
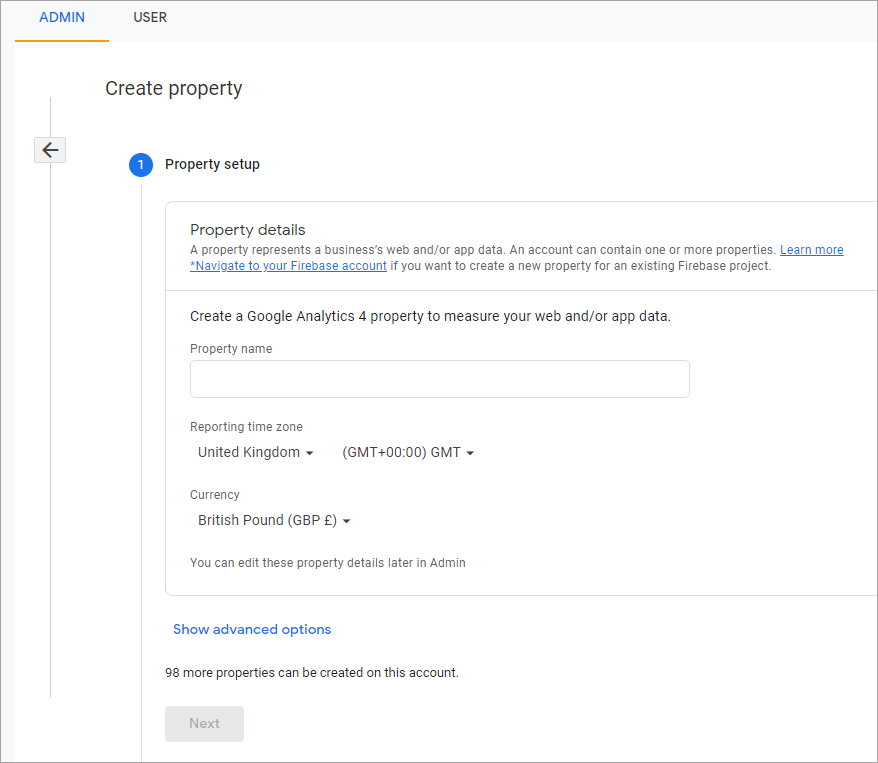
Enter your Property name. Click Next.
-
Fill out your business information (optionally).
-
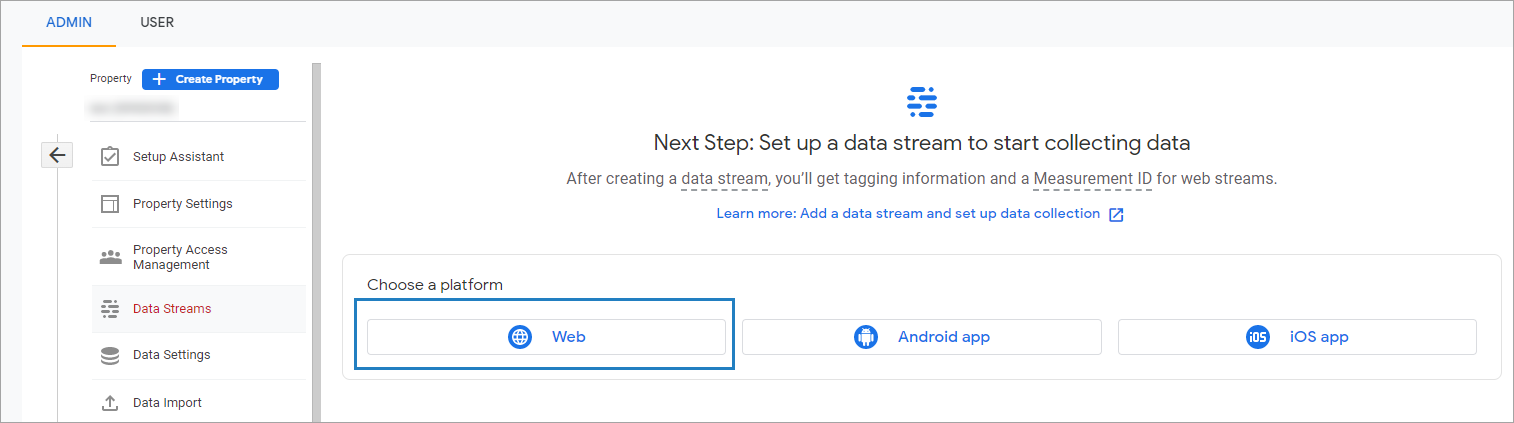
In the Data Streams section, select Web.
-
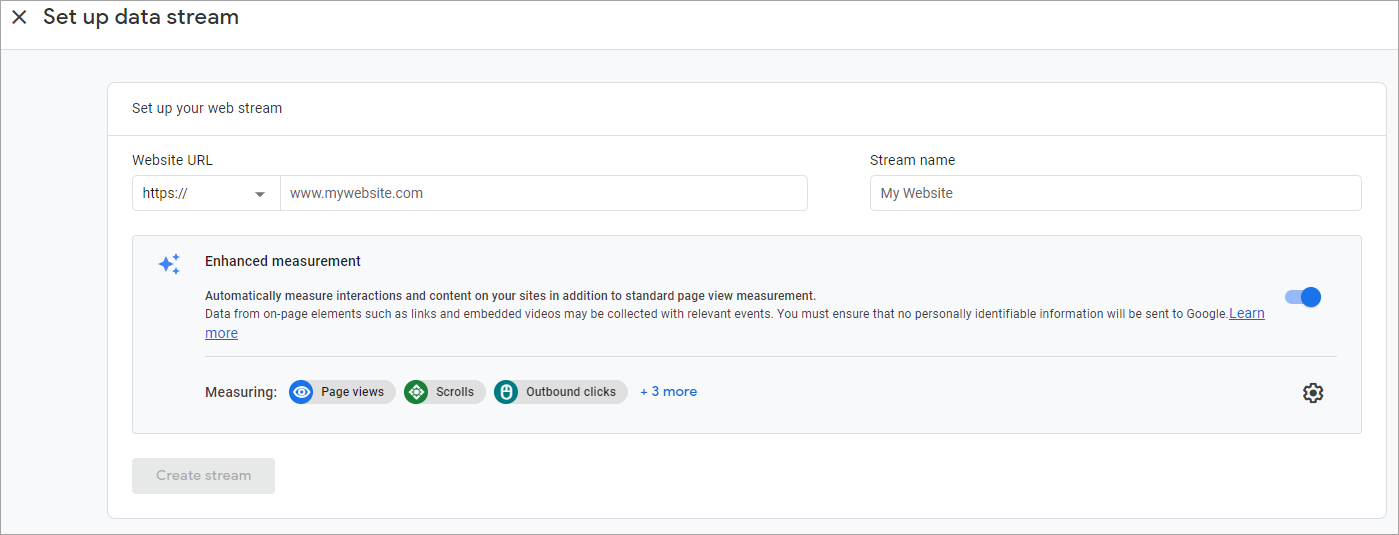
Specify your website URL and click Create stream.
-
In Web stream details, copy Measurement ID. You will need it later.
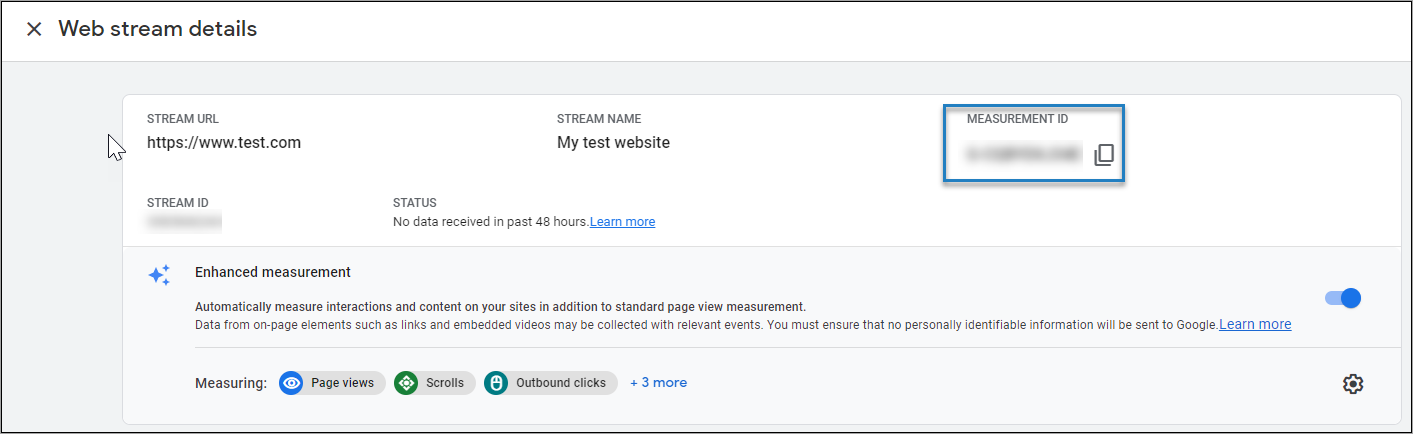
And that’s all you need to track specific bot events in your Google Analytics account.
Set up Aimylogic script
Let’s consider a simple script and see how many users have visited your bot more than once. The script will look like this:
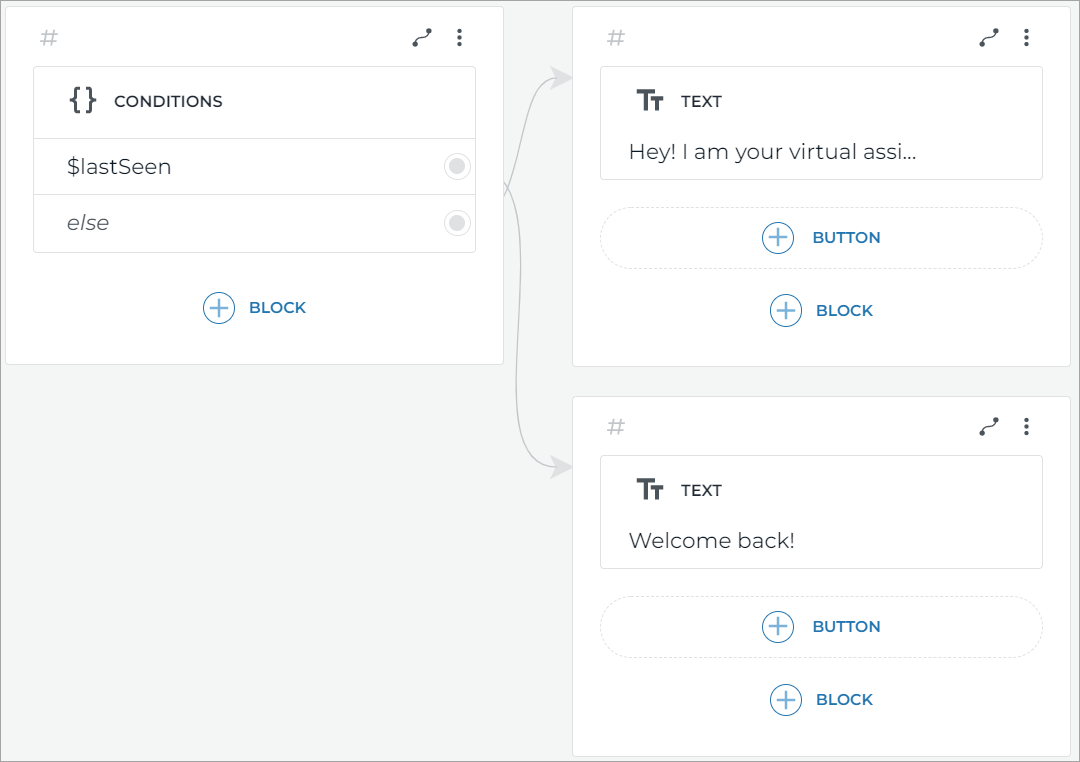
On the first screen, use the Condition block and add $lastSeen as the condition value.
$lastSeen is a system variable that stores information about how many seconds ago the user made their previous request.
- If the user used the bot for the first time, the variable will be undefined and the condition will return
false. Connect the else branch to a new screen with the Text block containing the string “Hey! I am your virtual assistant”. - If the user has already used the bot before, the condition will return
trueas$lastSeenstores a value. Connect the output of$lastSeento a new screen with the Text block containing a “Welcome back” string.
Pass information on the current user’s screen to Google Analytics.
To do this, use a webhook.
The Webhook article describes how to deploy a webhook in detail.
In this article, let’s consider a Node.js sample code.
The webhook.js file might look like this:
Expand sample code
const request = require('request');

module.exports = (webhook) => {
    webhook
    .on('new_user', (session) => {
        request.post({url:'https://www.google-analytics.com/collect?v=1',
                    form: {
                        tid:'***',      // Unique Measurement ID.
                        cid: $userId,   // Unique user ID, use the $userId system variable.
                        t: 'event',     // Request type. Possible options: pageview, screenview, event, transaction, item, social, exception, timing.
                        ec: 'game',    // The event category. You can choose any.
                        ea: 'new_user' // The event action. You can choose any.
                    }},
                    function(error, response, body){
                        if (!error && response.statusCode == 200) {
                            console.log("ok new_user", session.userId);
                        }
                    });
    });
    webhook
    .on('user', (session) => {
        request.post({url:'https://www.google-analytics.com/collect?v=1',
                    form: {
                        tid:'***',      // Unique Measurement ID.
                        cid: $userId,   // Unique user ID, use the $userId system variable.
                        t: 'event',     // Request type. Possible options: pageview, screenview, event, transaction, item, social,exception, timing.
                        ec: 'game', // The event category. You can choose any.
                        ea: 'new_user' // The event action. You can choose any.
                    }},
                    function(error, response, body){
                        if (!error && response.statusCode == 200) {
                            console.log("ok user", session.userId);
                        }
                    });
    });
};
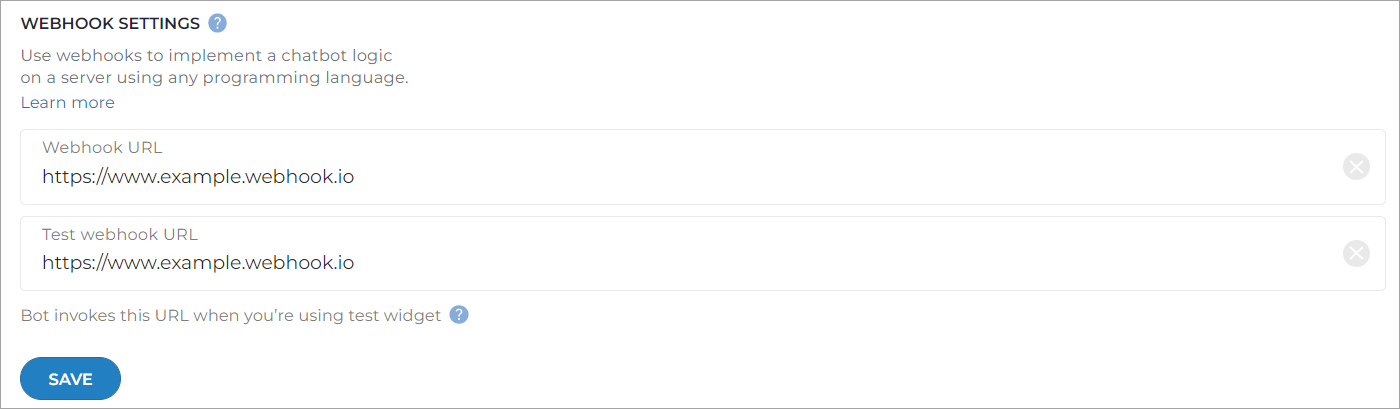
Once you publish this code to the webhook, go to the project settings in Aimylogic and enter your webhook URL.
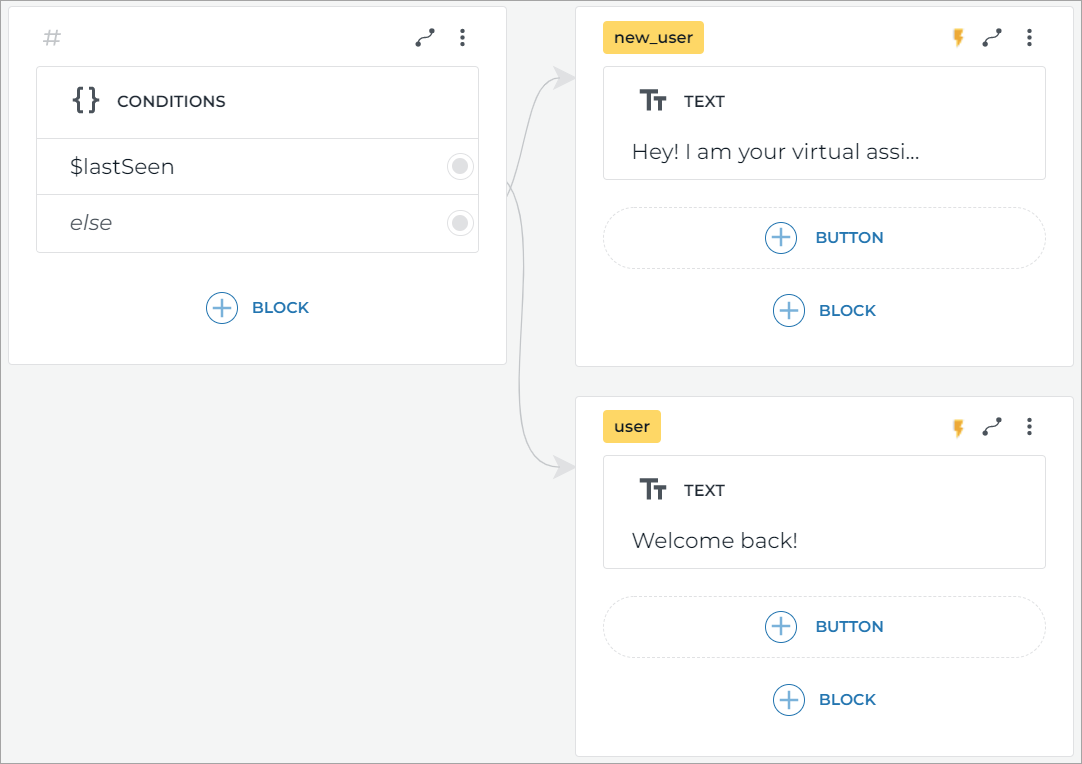
Return to the script, put the labels new_user and user on the corresponding screens, and enable the webhook.
Run the script and check that data is being passed to Google Analytics. In Google Analytics, go to Reports → Real-Time to see the statistics.