How to create a simple bot in J‑Graph
In this tutorial, you will create a simple chatbot that will:
Create a script
To start working in J‑Graph:
- Create a new JAICP project.
- On the control panel to the left, select Editor → J‑Graph.
You will see the canvas: the primary J‑Graph workspace. Move around the canvas by holding down the right mouse button or selecting any unoccupied space on the canvas with your finger on the touchpad. Zoom in or out using the mouse wheel or by scrolling with your fingers on the touchpad.
The script on the canvas consists of states. States are the screens with bot reactions and expected user responses to them. The script already has several states:
- The first required state of the script —
/Start. It is marked with a special flag. - The
/Helloand/Byestates. - The required
/NoMatchstate. It includes the bot response to unrecognized phrases. - The
/Matchstate — the bot reaction to phrases that are recognized but not handled in the script.
/Hello, /Bye and /Match states are not used in this tutorial, so you can safely remove them.Script states
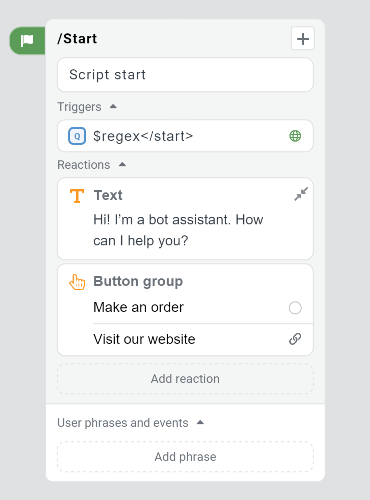
State 1. Bot greeting and menu
First, change the greeting to a phrase with information about the company, add a button menu and a link to your website:
- Go to the
/Startstate. - In the Reactions section, select the Text block and change the greeting in the Bot phrase field to the following: Hi! I’m a bot assistant. How can I help you?
- Select Add reaction below.
- In the menu on the right, select Button group → Add button.
- Enter the first button text: Make an order.
- Select Add button and enter the second button text: Visit our website.
- Activate the Button press action option → Go to link and paste the company’s website link in the
https://example.comformat. - Click Save.
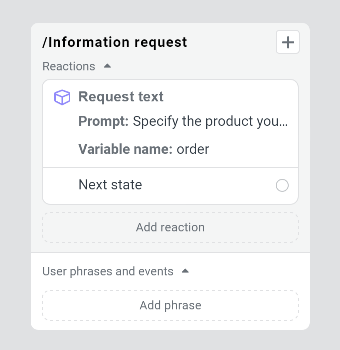
State 2. Order information request
Add a new state for requesting information from the user:
- Click in the top left corner.
- Enter the name of the state: Information request.
- Click Select an action below → Request text.
-
In the menu on the right, fill in the fields:
-
Prompt — enter the following text: Specify the product you would like to order. Please leave your contact info.
-
Variable name — enter a value named
order.tipInformation from the user will be stored in the$session.ordervariable. You can set up sending its value to the manager when finalizing the script.
-
-
Click Save.
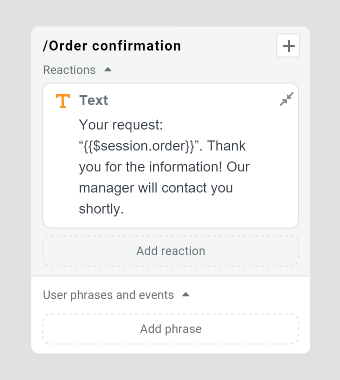
State 3. Order confirmation
Add a message on receiving the information:
- Add a new state called Order confirmation.
- Select Add block below → Text.
- In the Bot phrase field, enter the following text: Your request: “{{$session.order}}”. Thank you for the information! Our manager will contact you shortly.
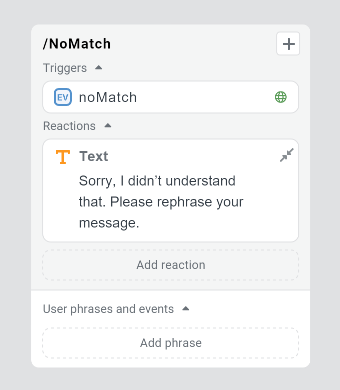
State 4. Bot response to unrecognized phrases
Now change the bot response to unrecognized phrases to one that suits you better:
- Go to the
/NoMatchstate. - In the Reactions section, select the Text block and change the greeting in the Bot phrase field to the following: Sorry, I didn’t understand that. Please rephrase your message.
Labels
You can annotate states with colored labels. This will allow you to evaluate bot performance results and improve its logic.
Hover over the /Order confirmation state, click , and add a label named Order completed. In the bot analytics, you will see the number of users who left their contact information.
Links between states
Now all the script states have been created, and you need to add transitions through them. They are called links.
To create a link from a state, place the cursor on in the block with the bot reaction or phrase, hold down the left mouse button or double-tap the touchpad, then hold and drag the line to the desired state.
- Connect the Make an order button in the
/Startstate with the/Information requeststate. - Connect the Text request in the
/Information requeststate to the/Order confirmationstate.
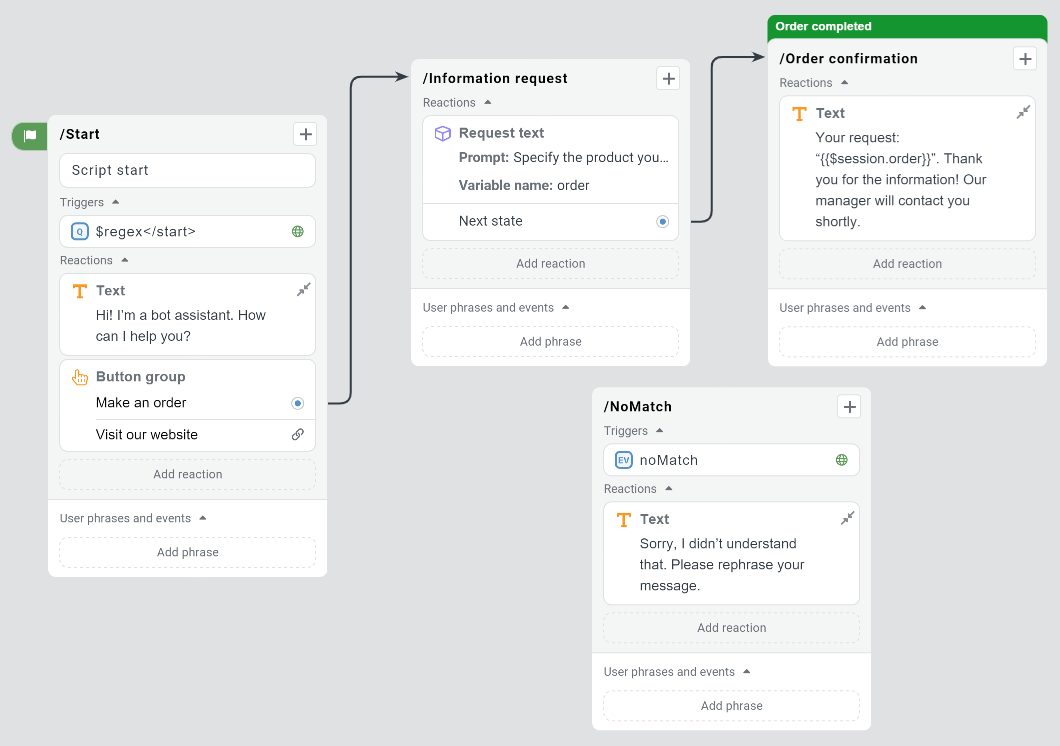
/NoMatch state is activated on any unrecognized user phrase, so it should not be connected with any other states.The script with the links will look like this:
Testing and deployment
To test the script, click Test the bot in the top bar of the screen. The test widget will appear on the right side of the screen. You can simulate a conversation between the bot and a user in this widget.
When you’re done testing, save the script using → Save script in the top left corner, then deploy the bot in one of the channels to communicate with your users. It can be a widget on a website, a chat in a messenger, or a voice assistant.
To deploy your bot to a channel:
- On the control panel on the left, select Channels.
- In the Inbound section, click Connect channel and select the channel where the bot will operate.
- In the new modal window, enter the name of the channel and complete the configuration.
The connection status will be displayed next to the channel name. The Works status means the bot has started operating in the channel.
What’s next
You can improve your project in the visual editor:
- Change bot reactions: for example, add more information about your company.
- Make the bot’s speech more natural: diversify bot replies using the Random answer reaction.
- Add more expected user phrases to states.
- Consider handling unrecognized user phrases and channel-specific events, as well as possible errors.
- Add an interactive part: the bot can send images and audio files, or receive files from users.
- Expand the bot logic: add an action block for sending order information to the manager via SMS or email.